


For people looking to undertake restorative dentistry, achieving the desired results relies on precise workmanship and high-quality equipment. Dental stains and glazes are among the wide range of tools available. If you want seamless restorative dentistry results, you’ll appreciate how dental stains and glazes revolutionize restorations and make them indistinguishable from natural teeth.

Among the most relied-on solutions is Aidite stain. Popular for its versatility, durability, and compatibility, Aidite Stain has proven dependable in creating restorations that blend naturally with existing dentition. This guide provides an in-depth look at the preparation, application, and post-application care of Aidite Stain.
All about Aidite Stain
Aidite Stain is a great glaze and stain for restorative dentistry. Dental glaze enables dental experts to replicate natural teeth’s unique textures and shades when restoring teeth. Aidite stain is a good stain to use on crowns, bridges, veneers, or even dental implants to capture a seamless transition with the existing dentition of the patient. Why Aidite Stain? First off, the product is easy to use and is compatible with any dental material out there. Aidite stain works best with zirconia or porcelain-based restorations. Because of this, Aidite stain is ideal for glazing porcelain dental surfaces.
Further, Aidite Stain features a stable formula that allows the color to hold for a long time. Learning how to use Aidite stain, combined with innovative glaze dental tools, can help restorative dentistry achieve lasting, lifelike results.
So, how about we evaluate how to use Aidite Stain effectively? By understanding preparation, application, and post-application care, you will surely achieve remarkable dental restoration results.
Preparing to use Aidite Stain
Proper preparation is an essential step towards achieving remarkable results using Aidite stain. Consider investing enough time in the preparation to achieve a smooth application and enhance the overall quality of the final restoration. Whether you are staining a crown, veneer, or dental implant, proper preparation lays the foundation for a long-lasting and aesthetically pleasing result.
Tools and Materials
Begin by assembling the vital tools and materials. You will need a set of fine brushes, a ceramic palette for mixing, and applicators to handle various aspects of staining. A functional dental furnace is also functional for firing the restoration. To achieve a professional finish, put the glaze dental products within reach.
Organizing your tools in a clean, well-lit workspace is imperative. Hence, ensure you have proper lighting when learning how to use Aidite Stain to achieve accurate shade matching and application.
Cleaning the restoration
Before applying Aidite Stain, make sure the restoration surface is thoroughly clean. Since dust and residue on the restoration surface can interfere with the stain’s adhesion, you might want to use ultrasonic cleaner or compressed air. A clean restoration surface also ensures that the application of glaze dental for implants is smooth.
Shade selection
Interestingly, glazing porcelain dental offers a comprehensive range of shades. This makes it easy for the expert to match the restoration with natural teeth. Luckily, Aidite stain also features a shade guide to identify the most appropriate color. Of course, some cases may require you to blend multiple shades to achieve a precise match. When planning to apply the dental composite glaze, remember to take into account how the translucency of the glaze will impact the final shade.

Drying the restoration surface
Once you select the shade and clean the restoration surface, dry it before applying Aidite stain. Since residue and moisture can dilute the stain and affect its adherence to the surface, use an air blower to dry the restoration surface.
Set up a functional workspace
One of the most important factors when learning how to use Aidite Stain is setting up a convenient working space. Hence, put the palette, brushes, and glaze dental products within reach. A magnifier can also help in adding precision when applying dental glaze for implants.
With the above preparation, you’re ready to apply the stain professionally. So, let’s dig in.
A step-by-step guide to applying Aidite Stain
After learning how to use Aidite Stain, it is time to get right into it. Here’s a comprehensive guide for optimal restorative work results.
Mixing the stain
First, prepare the stain by placing a small amount of Aidite Stain powder onto a clean ceramic palette. Gradually add the recommended mixing agent and mix thoroughly with an applicator or fine brush. The objective is to achieve a smooth consistency; neither overly thick nor overly runny.
If you’re working with multiple shades, keep each color separately on the palette to avoid contamination. Otherwise, when blending shades, add color incrementally. You will have a spare piece of material to confirm the final hue. This is particularly important when layering how to use Aidite Stain knowledge with other glaze dental products since their interaction can subtly alter the overall appearance.
Consistency matters most in the mixing stage. Thereupon, ensure you achieve a well-mixed stain to avoid uneven coverage during firing.
Applying the Stain
1. Layering for natural effects
First, use the stain to mimic the usual variation in color on the surface of the teeth. It can be started with the flowing lighter color to make the base on them. Utilize a small brush when applying the streaks of thin and uniform stains with an orifice, using areas such as cusps and incisal edges since this is where brightness and translucency come into play.
Once the base layer dries up, gradually introduce darker shades to add depth and definition. Pay close attention to fissures, groves, and areas near the gum line. These are areas where natural teeth develop a slight discoloration. Working with thin layers is important because they allow for better control over the final appearance. This will prevent you from achieving an overly saturated restoration.
2. Precision techniques
When working on more intricate details, switch to a finer applicator or a smaller brush. High precision is needed when working on unique features such as translucency effects, stains, or enamel cracks that occur naturally on teeth. Combining the knowledge of how to use Aidite Stain with dental composite glaze can help refine these details.
Pro tip: Apply the stain sparingly to avoid oversaturation. When learning how to use Aidite Stain, applying thin layers is ideal for achieving exceptional results.
3. Drying and Firing
- Air drying is important in achieving an equally adhered stain before putting it through the furnace to allow the restoration to dry.
- Follow the firing cycle and temperature setup that Aidite recommended. Correct firing ensures that the stain and Glaze dental material adhere well to the restoration.
- After firing, examine the restoration in normal light conditions.
Pro tip: careful application and adherence to guidelines will help you create restorations that are both aesthetically appealing and long-lasting.

Post-Application Care and Tips
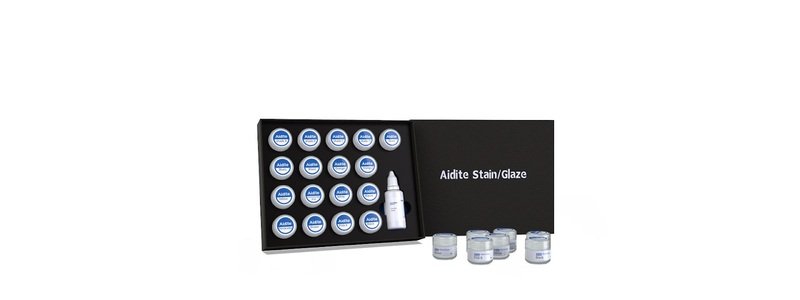
Aidite Stain Glaze Kit should be cared for and finished properly after application and firing. These routines allow the restoration to look natural and perform like natural teeth.
Polishing is an effective care routine that protects the stain and glaze dental layers from premature wear. Polishing also removes any rough edges that may have come when applying or firing stains. Polishing, in general, allows for a more spitless interface to the stain restoration versus the actual tooth dentin.
One of the simplest tips for taking care of your dental restorations is proper oral hygiene. If you have sensitive teeth, consider non-abrasive toothpaste as you do not want abrasive whitening products to break down the stain. To maintain the restoration, another tip suggested for the dental checks is to schedule the routine.
FAQ on Optimal Restorative Dentistry
What is Aidite Stain?
Aidite Stain is a reliable dental glaze and stain that works by mimicking the natural texture and color of teeth.
What materials are compatible with Aidite Stain?
Aidite works well with zirconia and porcelain-based restorations. Therefore, you can use it with veneers, crowns, implants, and bridges.
What tools are needed when applying Aidite Stain?
When learning how to use Aidite Stain, get applicators, fine brushes, a ceramic palette, and a dental furnace.
Can I achieve a polished finish on dental glaze for implants?
Yes. You can use specialized polishing tools to smooth the restoration, protect the stain layers, and enhance its gloss.
Conclusion
Learning how to use Aidite Stain, combined with professional restorative techniques and tools, can transform ordinary dental restoration into works of art. Over the recent years, Aidite continues to supply quality and affordable orthodontic devices – and the Aidite stain is no exception. Whether you’re looking to get glazing porcelain dental restorations or want to apply dental composite glaze to implants, Aidite products deliver exceptional results.
For professionals seeking to refine their craft in restorative dentistry, Aidite Stain offers an accessible, versatile solution to meet a variety of aesthetic challenges. By combining Aidite Stain with proper practice and attention to detail, you can elevate the artistry of your restorations and deliver exceptional outcomes for your patients.