


Using a digital dental scanner for restorations without proper knowledge can cause many problems. Capturing inaccurate anatomical details and trauma to the gum tissue are common among them.
When a dentist uses a dental scanner without any expertise, they get a poor impression of the patient’s mouth. As a result, dental models do not adjust properly in the patient’s mouth, which leads to complications. In some cases, it can cause infection and damage the soft tissues. In this article, you will learn the detailed guide on how to use a dental scanner to avoid these problems. So, keep reading to save your time and money.
What is a Dental Scanner?
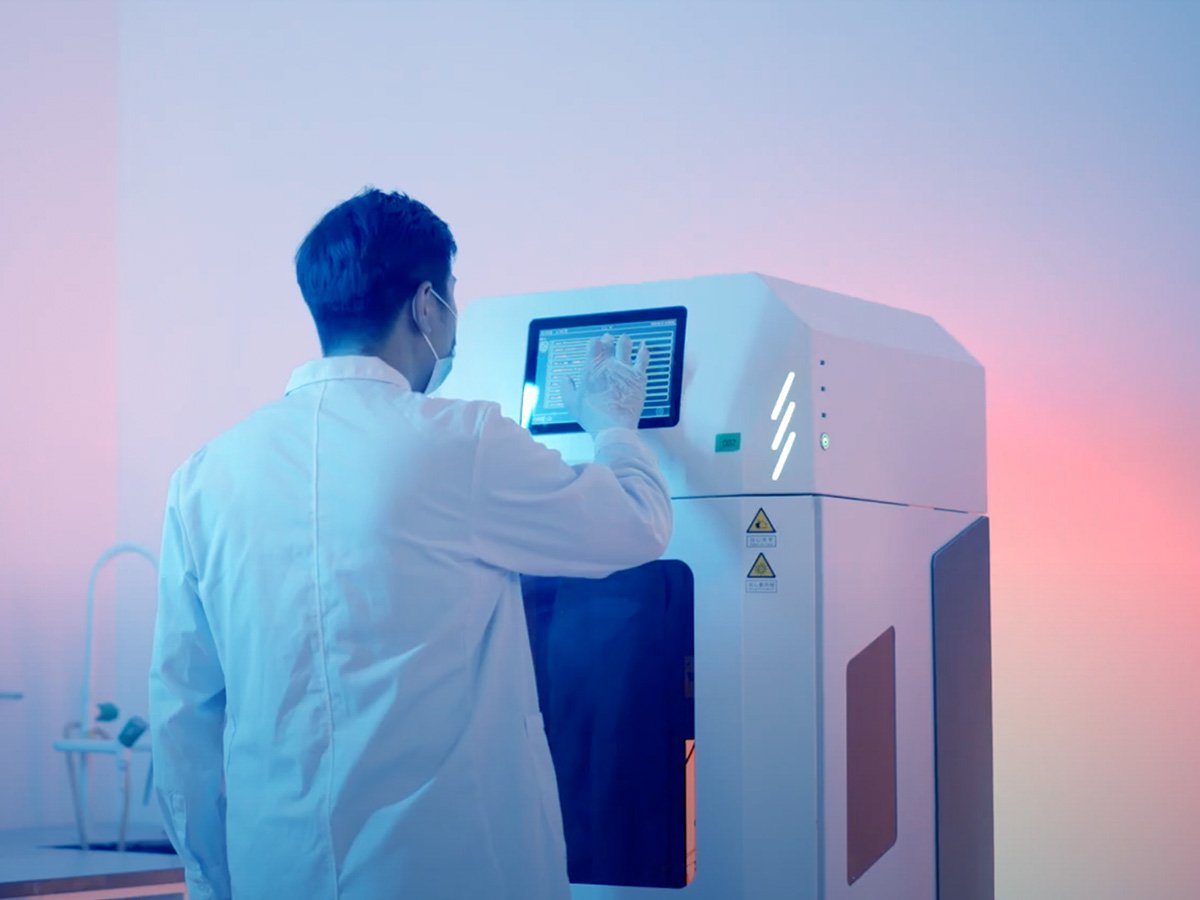
A dental scanner is a piece of dental equipment used by dentists to take digital images of a patient’s mouth. They capture a detailed 3D view to better diagnose the problem without mess. The working principle of a dental scanner is simple.
This device is equipped with light or laser technology. This technology captures the fine detail of the gums, bone tissues, and other areas. The digital dental scanner creates multiple images and then combines them into a 3D model.
This model can be used for planning treatments, making crowns, or even designing braces.
What are the Common Types of Dental Scanners?
There are two different types of dental scanners used in dental labs for different purposes. Let’s explore each one with detailed specifications.
– Intraoral Dental Scanners
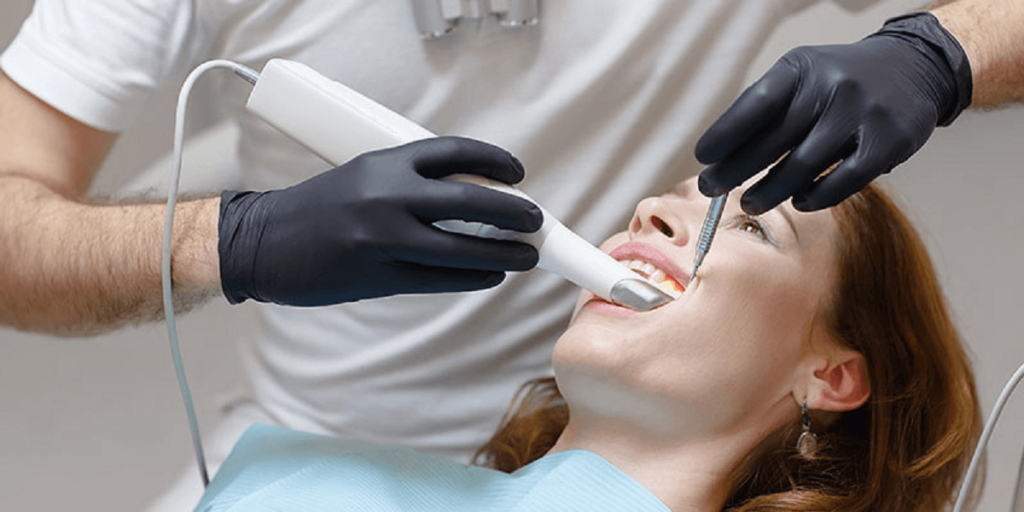
Intraoral dental scanning is commonly used inside the patient’s mouth. This scanner uses advanced optical or laser technology to capture detailed images of the patient’s mouth. The working principle involves using a light source or laser to scan the surfaces inside the mouth. The scanner takes thousands of images and then combines them into a single 3D model. The Dental Scanners take thousands of images and then combines them into a single 3D model.

– Extraoral Dental Scanners
The extraoral scanners are used outside the patient’s mouth. These scanners are generally larger than intraoral scanners. Dentists use this tool to capture the entire dental arch, including the teeth and jaws.
The working principle of extraoral scanners involves taking high-resolution details with imaging sensors. You can use this scanner for complex dental procedures.

How to Use a Dental Scanner? Step-by-Step Guide
Here are the detailed steps about how to use a dental scanner that enable you to use the device easily without causing any technical errors.
Step 1: Prepare the Patient
The first step of using the scanner is to make sure your patient feels comfortable and ready. You should ask your patient to sit back in the dental chair. Adjust the chair to a position where the patient’s mouth is easy to access.
It is important to explain the procedure to the patient. So they feel relaxed and understand what will happen. Furthermore, make sure the patient’s mouth is clean and free of any debris.

Step 2: Set Up the Scanner
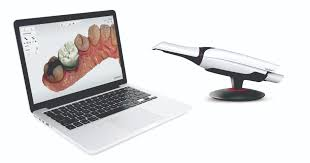
The second step is to make sure the digital dental scanner is fully charged. You can check it by turning the scanner on and analyzing if the software is running properly. The scanner should be connected to a computer monitor.
If your scanner has disposable tips, attach them according to the manufacturer’s instructions. This step is essential for maintaining hygiene and ensuring the dental scanning result is accurate.
Step 3: Position the Scanner Properly
Now it’s time to set the position of the scanner properly inside the patient’s mouth. You can hold the scanner at a slight angle. Then, move it gently to the area you want to scan. Make sure the scanner tip is close to the tooth surface. During the fixation process, avoid moving the scanner too fast or pressing it too hard. It causes inaccurate dental scanning. So, clear and accurate positioning ensures the teeth or gum image quality.

Step 4: Begin Scanning
Once you set the scanner position, then start scanning the patient’s mouth. You can move the scanner tip slowly across the tooth’s surface. The scanner will capture images of each part of the tooth and surrounding areas.
It’s essential for you to scan every area needed, such as the front and back teeth and the sides of each tooth. It’s important to move the scanner smoothly and slowly. A sudden jerky movement caused a blurry scan result.
Step 5: Adjust the Angle as Needed
During the scanning period, you need to adjust the angle of the scanner. This step is necessary to capture hard-to-reach areas. If you want to scan the back of the molars, move the scanner at a different angle. Keep the scanner’s tip close to the teeth. At the same time, you should also maintain a comfortable position for the patient. Adjusting the scanner’s angle enables you to get an accurate image of the patient’s mouth.

Step 6: Review the Scan
After you finish your dental scanning process, check the 3D models on the monitor. Look for any blurry or missing areas. If any areas are not clear, you can quickly go back and capture those spots.
It’s essential to ensure the scan is complete and accurate. Any issues can affect the quality of the final dental work, such as crowns or bridges. This step is very important to make sure the treatment or dental models fit well without any adjustment.
Step 7: Save and Export the Scan
After you finish adjusting the scanned images, save them in your system. Some dental scanners enable you to export the scan in different file formats. Later, you can share with other dental professionals.
It’s important to ensure the scan is stored properly for future use or reference. Save the scan under a patient’s name or ID for easy access later. All these steps enable you to understand how to use a dental scanner without any troubleshooting.
3 Best Suppliers of Dental Scanners You Should Consider
It’s important for you to keep the cost, dental scanning quality, and accuracy in mind before choosing the scanner. Here are the top three brands that provide cost-effective scanners.
– Aidite
Aidite is a brand known for its quality, accuracy of products, and cost-effective dental solutions. The brand provides different dental tools and equipment. They provide dental scanners, printers, and zirconia materials.
Aidite’s Rapid 3 intraoral scanner enables you to use this for a wide range of dental applications. You can capture minor details with high resolutions. Its interface is user-friendly and easy to operate even for beginners. Their scanners are lightweight and portable. You can move easily in various clinical settings. Furthermore, their scanners are cost-effective and reduce the chances of errors or patient discomfort.

– 3Shape
3Shape is another leading supplier of dental scanners. The brand mainly focuses on cutting-edge technology and innovation. They provide a wide range of intraoral and laboratory scanners.
All their scanners easily fit both small and large dental practices. 3Shape scanners are known for their accuracy, speed, and ease of use. In just a few minutes, you can capture high-resolution images with great accuracy. Their scanner has the feature of wireless connectivity and cloud-based storage. So, you can easily integrate the scanner with existing systems.
– Planmeca
Planmeca is another great supplier of dental equipment and tools. They provide both intraoral and extraoral scanners that are precise and fast in speed. You can easily use their scanner to make precise and accurate dental models.
Their scanners are lightweight and provide a simple scanning process that reduces the time patients spend in the chair. Its excellent imaging capabilities enable the dentist to capture detailed 3D images. So the risk of errors or ill-fitting decreases. The brand’s focus on innovation and quality ensures that their scanners are a valuable investment for dental labs.

Frequently Asked Questions
Is teeth scanning painful?
No, teeth scanning, like 3D scans, is typically not painful. The process involves using a small scanner to capture an image of the patient’s mouth. Some people feel light pressure or sensitivity during this process. However, this process is free from any pain or discomfort.
What does a dental scanner do?
Dental scanners enable the dentist to diagnose the patient’s problem and plan a better treatment. You can easily scan the patient’s mouth and make 3D models. A digital scanner also consists of software that enables you to adjust the model’s size and shape.
How long does a dental scan take?
It depends on the scanner specifications, quality, and dentist expertise. Usually, dentists take around 20 seconds to scan the teeth or surrounding tissues. However, 20 to 30 minutes is the average time a scanner takes to scan the whole mouth area of a patient.
Final Thoughts
To sum up, it’s necessary to gain the knowledge of how to use a dental scanner properly. A small or minor error in scanning leads to damage to the patient’s mouth tissues. If a dentist doesn’t take a precise image of the patient’s mouth, they may plan the wrong treatment. The situation further aggravates when models made from this error scanning cause ill-fitting. It’s important for dentists to know the right method of using the scanner. It enables you to eliminate the risk of treatment errors or patient discomfort. So, in the future, you can enhance your treatment success and patient satisfaction with your dental service.