

Dental impressions, the impressions of teeth and soft tissue made for treatment, are the basis of many successful dental treatments, from crowns and bridges to dentures and orthodontic appliances. Knowing how to take dental impressions correctly ensures a better fit for comfort for the patient and durability. With increased demand for digital and traditional types of dental impressions, the importance of reliable goods is only amplified. Which is why dentists worldwide trust Aidite for their reliable and winning-edge dental materials to simplify the means of impression so as to get consistent, great results.
Understanding the Importance of Dental Impressions
We need to know how to take dental impressions before we go into the step by step dental impression technique. Dental impressions give an accurate mold of a patient’s dental and oral structures. They’re used for creating crowns, bridges, dentures, orthodontic devices, and other dental prosthetics. In the absence of an accurate impression, any restoration or appliance may not fit properly, leading to discomfort or even treatment failure. Aidite is a leader in providing innovative solutions to ensure the best practices for taking dental impressions and the simplest process for dental professionals to create flawless molds with as little patient discomfort as possible.
Types of Dental Impressions
There are two main types of dental impressions, traditional and digital, with different techniques involved and benefits.
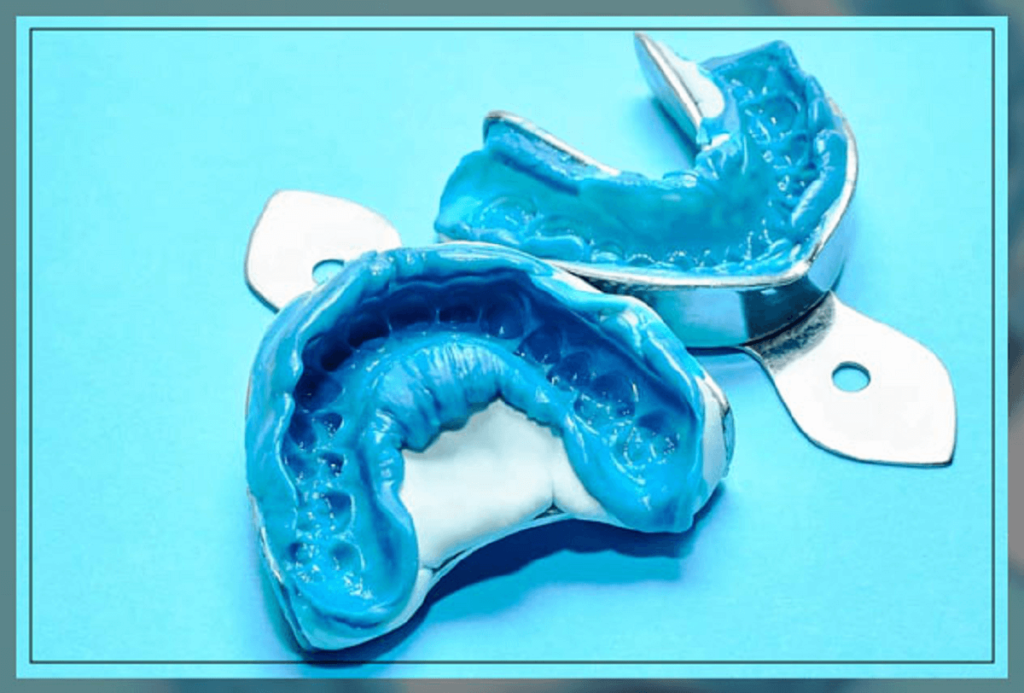
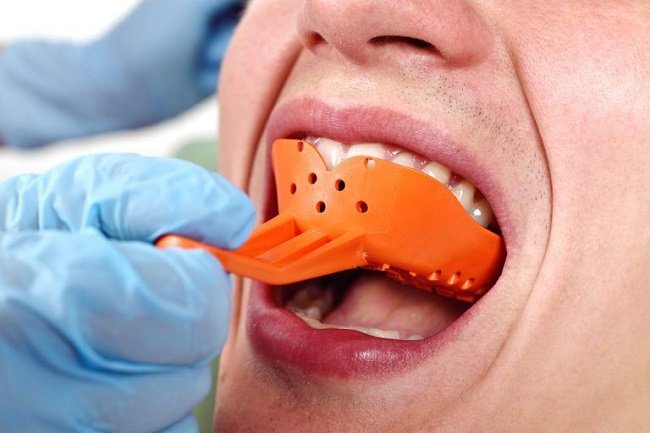
1. Traditional Dental Impressions
These involve the use of physical materials such as alginate, polyvinyl siloxane (PVS), or polyether to better create a mold of the patient’s tooth and oral tissues. A tray is filled with the material and placed into the mouth to set to create very specific impressions.
2. Digital Dental Impressions
Using intraoral scanners, we can get a three-dimensional digital image of the mouth. Impression materials, trays, and scanning time multi-factors are done by the scanner easily with a very fast record of the outer peripheral structures. They provide a more comfortable experience for patients, the ability to check the scans on the spot, and a quicker lab turnaround. Aidite provides material for use in digital workflows and is compatible with most modern scanning CAD/CAM systems.
Step by Step Dental Impression Technique
The step by step dental impression technique skill is essential for ensuring the accuracy and comfort of your patient. So, below is a little guide on how to take dental impressions of your teeth:
1. Patient Preparation
Describe the process to the patient before beginning to alleviate any apprehension. Look for oral problems, like sores and loosened teeth, that can interfere. One of the best practices for taking dental impressions is adequate preparation to make thing gone smoothly without cooperation and movements.
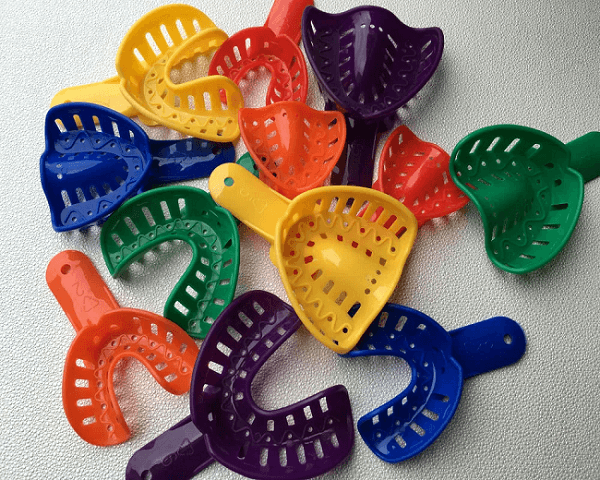
2. Tray Selection
Selecting the right size of trays is very important. It has to cover all teeth and soft tissue and not extend onto the tissues that will cause tissue impingement. When it comes to learning how to take dental impressions, the right tray size plays a crucial role.
3. Tray Adhesive Application
Use a layer of tray adhesive on the tray that is non-porous to hold impression material in place. During removal, it prevents the material from “spooling” out of the tray and is an important step by step dental impression technique.
4. Material Mixing
Mix the material according to the documentation, removing all air bubbles inside of it. Using high-quality materials as gained from Aidite leads to smooth, consistent mixtures that allow for easy learning of how to take dental impressions while also maximizing the reliability.
5. Loading the Tray
Deposit evenly the combined material in the tray but do it from the posterior area so you avoid trap air. Uniform, so the types of dental impressions taken largely capturing the full and complete detail of the the region in question.
6. Positioning the Tray
Gently place the tray into the patient’s mouth, ensuring a proper, symmetrical seat. Ensure that all structures are included, this is one of the most important in digital vs traditional dental impressions especially working with a physical material.
7. Lip and Tissue Management
Gently pull back the lips, cheeks, tongue, and insert and seat the tray. This prevents soft tissue distortion and allows the material to record the anatomy precisely; key elements of the best practices for taking dental impressions.
8. Setting Time
Let the impression material set without vibration in the tray. Any movement during this phase can cause distortions. Particularly, the setting time of Aidite is relatively consistent, hence this feature is very appealing to those who are studying how to take dental impressions.
9. Tray Removal
Leave to set and then wiggle and rock the tray to get it free from the mouth. The soft removal is to save the details captured inside the impression, which is one of the main objectives in a step by step dental impression technique.
10. Inspection
Check the impression as soon as it has been taken for gaps, bubbles or deformation. Retake if come across any shortcoming having thorough inspection is a step in the best practices of taking dental impressions not to let any mistakes go to the lab.
11. Disinfection and Storage
Once approved, starve the impression for the proper disinfection protocol before submitting it to the laboratory for the fabrication of the restoration or to be scanned either for digital recording. Regardless of digital vs traditional dental impressions workflows, proper handling helps maintain the integrity of the.
This step by step dental impression technique provides dental professionals with tips to ensure dental impressions taken are precise and consistent, making it easier to learn how to take dental impressions.Getting premium materials such as those from Aidite will only guarantee better results.
Top Tips for Dental Impressions
Applying the best practices for taking dental impressions. Some essential tips include:
- Use Quality Materials: With high-quality materials like those from Aidite, we can guarantee you the perfect details along with consistent results every time!
- Moisture Control: Cotton rolls, suction or isolation techniques can help in achieving a dry field for the materials to better perform.
- Sitting of the Tray: The tray must be seated completely and evenly to detect all anatomical structures.
- Apply Tray Adhesive: This helps to hold the material inside the tray and not get detached out of the tray during pulling.
- Communication to Patients: Instruct the patient to remain still and breathe through the nose to reduce movement.
- Inspect Impressions Immediately: Always check on impressions as soon as they are removed to catch any problems early.
By incorporating these best practices for taking dental impressions, the accuracy of the impression is enhanced, minimizing the need for the impressions to be repeated, thereby being time and resource-efficient.
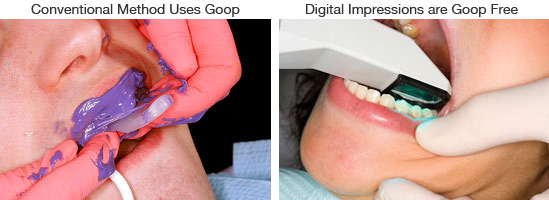
Digital vs Traditional Dental Impressions
Differences between digital vs traditional dental impressions help in making the right choice in mastering how to take dental impressions, as digital dental impressions may not be the right choice for every case. Below is a comparison:
| Aspect | Traditional Dental Impressions | Digital Dental Impressions |
| Technique | Utilizes trays and impression materials to literally make a copy of the structures of your mouth. | Intraoral scanners generate a 3D model of the teeth and soft tissue. |
| Patient Comfort | Can trigger a gag reflex or an uncomfortable feeling due to bulky materials and the need to insert a tray | Most comfortable, no heavy trays or material in the mouth. |
| Accuracy | If done right, it offers very high accuracy, especially with materials like Aidite. | Gives accurate 3D data but is dependent on operator expertise and accurate calibration of the scanner. |
| Time Efficiency | Takes longer because of the need for setting time, second attempts, and physical shipping to labs to analyze samples. | Speedy acquisition, instant digital transfer to labs, and fewer reshoots. |
| Storage & Records | It requires a physical space to store models and impressions. | Digital files are basically available at your fingertips when you need them, and you can transmit virtual files with just a couple of clicks. |
| Cost | Reduced upfront costs in terms of equipment, but more expensive ongoing material costs. | Expensive scanner initialisation, but cheap materials and freight later on |
| Application Scope | Indicated for the majority of cases, including full-arch impressions with high complexity. | Great for crowns, bridges, aligners, and implant planning, with a few exceptions for full-arch cases. |
Each of the digital vs traditional dental impressions carries its own set of benefits. But, no matter the way you choose, learning how to take dental impressions properly is the secret ingredient for optimal results. The materials that Aidite has consist of high precision, are very easy to use, and ensure management of those techniques/ combinations to care for patients.
Common Mistakes and How to Avoid Them
Best practices for taking dental impressions are a skill that even seasoned professionals can mess up when learning. As the saying goes, to err is human, but we can do a better job, so here are the most common mistakes and how to avoid them:
- Incorrect Tray Size: Using an ill-fitted tray, if it is small or large, incomplete or distorted impressions of the dental arches may be obtained. Choose a frame size at all times size which covers all the structures that are necessary.
- Improper Mixing: Mixing too quickly or mixing imperfectly can introduce bubbles, leading to weaker material. Mix only as required per manufacturer instructions, they are easy and bubble-free mixing with aidite materials.
- Movement During Setting: Any slight patient or tray movement during setting can distort the impression. Ask the patient to hold still and brace the tray stable
- Poor Material Quality: Low-quality material may be torn, malformed, or unable to capture the details. Trustworthy brands such as Aidite will produce high-quality, correct results.
- Inadequate Moisture Control: If saliva or blood contaminates the area, details can be lost. There are various isolation techniques, such as cotton rolls and suction devices, which are always needed to keep and manage the area dry.
Controlling these factors will make sure that every type of dental impression exactly reproduces the anatomy required for the proper fabrication of the prosthesis.
FAQs
Q1: What materials are best for taking dental impressions?
Such high-quality impression material as provided by Aidite has advantages in handling, patient comfort, and high accuracy of detail reproduction, achieving successful digital vs traditional dental impressions
Q2: How long does it take to complete a dental impression?
Common traditional impressions take around 5-10 minutes with the setting. Digital impressions typically take a few minutes
Q3: Can digital impressions replace traditional impressions completely?
While digital impressions are becoming more common, particular full-arch, edentulous, or complex cases will always require traditional approaches. These two approaches are complementary, depending on both clinical needs and the complexity of each case.
Conclusion
Getting it right on how to make a dental impression means covering the types of dental impressions, step by step dental impression technique, the best practices in taking dental impressions, and digital vs traditional dental impressions. This allows dental professionals to avoid common mistakes and use quality materials from Aidite, which in turn, gives practitioners reliable and predictable results for both parties. Whether you are a novice dentist or a seasoned clinician honing your craft, taking the time to learn how to take dental impressions successfully and utilizing the right dental impression materials, such as Aidite, will take you one step closer to clinical success.